For those of you who have ever seen a Dawn commercial, you are familiar with at least one of the steps of the waterproofing process. The waterproofing process is an absolutely critical step in the rehabilitation process, especially for seabirds. Without it, you may have a bird that looks clean for the most part, but once it lands on the ocean or dives to fish it will soak up water like a sponge and get too cold to eat (and it may even sink). The reason you see birds constantly preening and bathing is because clean and waterproof feathers keep the bird warm, able to fly, weather proof and for seabirds and waterbirds able to float and dive for food.
The waterproofing process is more than just dunking a bird in soapy water and rinsing it. It really does take experienced people and the necessary facilities to wash, rinse and monitor a bird’s waterproofing.
Here are the steps of waterproofing process:
Before the bath…
Before a bird is put through the bathing process, it must first pass a health exam. This ensures the bird is stable enough to withstand the waterproofing process. This exam involves a thorough physical exam, blood tests, and strict weight and behavior standards. Once the bird has met all criteria of stabilization protocol, the waterproofing process can proceed.
Step one: the bath
Did you know that birds have a body temperature of between 104-106 degrees F? That is why we installed an on-demand hot water system with temperature control that ensures we never run out of hot water. If you wash a bird in room temperature water, the bird runs the risk of becoming chilled and could possibly go into shock. We take great care to make sure our water temperature is within the same range as a bird’s body temperature.
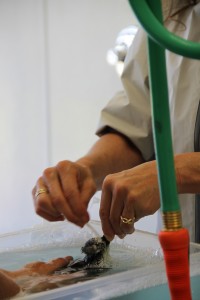
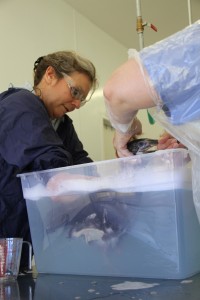
Step two: the rinse
After the bath step the bird is meticulously rinsed to ensure all feathers are clear of soap or other residue. Anything left will prevent it from becoming waterproof. Following nationally recognized wash/rinse procedures, we treat our water for hardness and give the washer/rinser control of the water pressure and temperature (this applies for both the wash and rinse stages). Why treat the water? Even though the water may look clean, there may be particles that are invisible to the human eye that could build up on the feathers and get in the way of the feather’s hooks and barbs, ultimately preventing the bird from waterproofing itself when it preens.
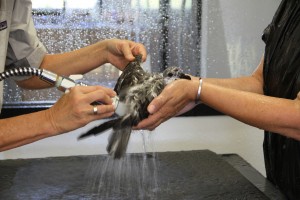
Step three: drying
After the bath and rinse, the bird is placed in a holding pen with a specialized pet dryer. This pet dryer warms the entire pen and allows the bird to dry and preen slowly. This is where the bird must do its part by preening the hooks and barbs of each feather back in place. This can take a few days to accomplish. We never use a hair dryer or any dryer that produces concentrated, focused heat because it will burn the bird’s skin.
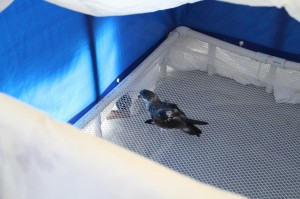
Step four: the pool
This is an important step because it is the way we ensure the previous three steps has indeed helped the bird become 100% waterproof again. Only after it is determined to be back to fully waterproof will we consider releasing the bird back into the wild. HWC staff introduce the bird to one of our conditioning pools and closely monitor it to make sure it stays buoyant. When it comes out of the pool, HWC staff also check to make sure the bird’s skin and underfeathers are dry. The amount of time the bird spends in the pool is slowly increased until we are sure that it is comfortable on the water.
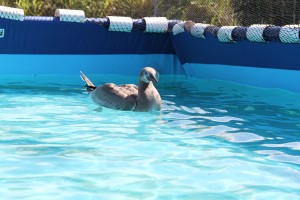
Once all looks good, we begin planning for the bird’s release!
